January 05, 2019
Using React and BTCPayServer to receive Bitcoin Payments
Create a simple store front using ReactJS and integrate with BTCPayServer to be able to recieve Bitcoin and Lightning Payments.

Cruising through twitter, I started to see different accounts that offered products/services for bitcoin and got curious of how they where processing these payments. Was it manual? Or did they have some sort of automation to easily handle this?
After asking around, I started to see that a lot of them just used the “send payment to this address and then send me the transaction Id” method. This implied that the buyer, first, had some basic knowledge of transactions and block-explorers and second, that they would have to make the transaction, go into a block-explorer, find the respective transaction Id and finally send it to the seller. All of this while hoping some bad actor wouldn’t be looking into the transactions and claim that transaction Id first and for himself.
On the other hand the seller would need to receive the transaction Id and manually verify that it had come through. All of this, plus the loss of privacy (anybody could go into the address provided and see all the transactions), was just a complicated process for both the seller and the buyer.
With all the development that I see going on in the crypto-sphere, there had to be a much simpler solution to all of this, and after some research I finally stumbled upon BTCPayServer. It was a perfect solution. It can generate different addresses for each invoice, keep track of them, charges no fees, doesn’t need KYC, you control your keys, and best of all its completely open source. You can (preferably) host it yourself or borrow the service from one in a dozen different websites for $0.
I will now show you how to setup a very simple store, that sells socks and accepts bitcoin, using a provider of BTCPayServer called BTCPayJungle. We will do all of this for a total price of $0!
Creating a Sock Shop with BTCPayServer

Head on over to BTCPayJungle and register your account.
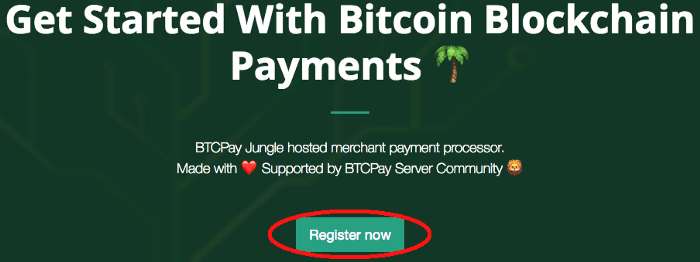
After registering, go to Stores and click on “Create a New Store”. Give your store an awesome name and click “Create”.

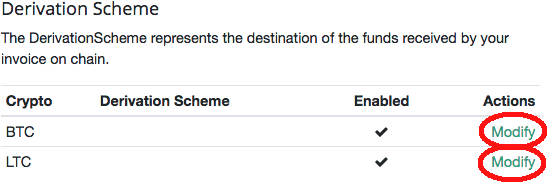
Once inside, in “General Settings”, most important part is to set up the derivation schemes which you can get from your BTC wallet. I would highly recommend having a Ledger hardware wallet since it already has integration with BTCPayServer set up.
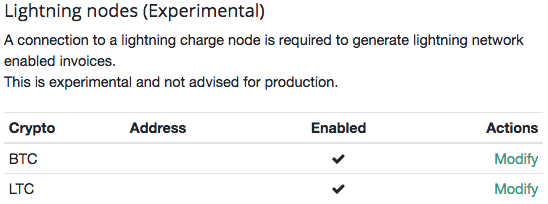
Bonus If you have a lightning node you can also set this up to start receiving lightning payments!
After you have added the derivation scheme for BTC (and LTC if you wish), head on over to “Checkout Experience” where we will be customizing how the payment module looks.
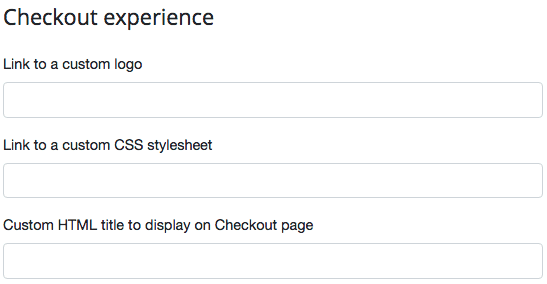
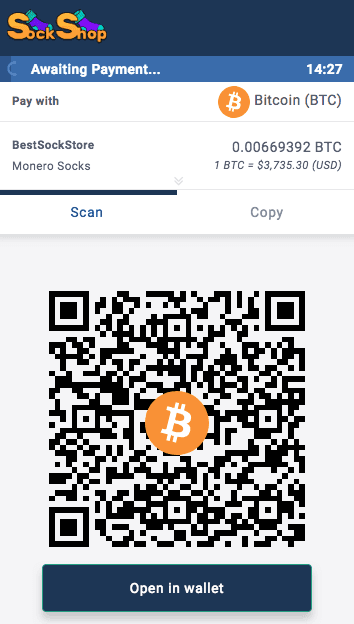
Here we will add a custom logo (hosted using ImgSafe), a custom css stylesheet (hosted using Dropbox) and a title for the checkout page. We now have a more personalized checkout experience :) If you want to use mine, you are welcome to do so with these links:
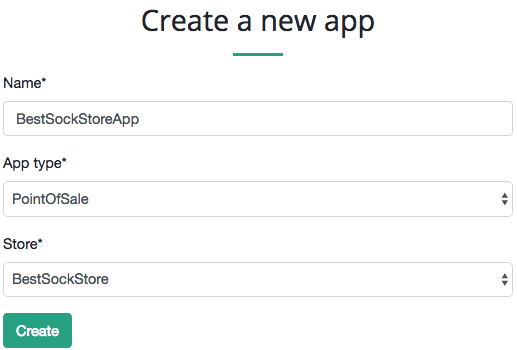
After all these general settings we can now create the actual store, so go to Apps and click on “Create new App”. Fill In the name, leave app type as “Point of Sale” and select the store you just created.
The app will default to a Tea store so we have to change some fields. Change the name and deselect the “User can input custom amount” checkbox. Then replace the Template text with the following:
bitcoin socks:
  price: 10
  title: Bitcoin Socks
  description:  Show how awesome you are with these Bitcoin socks!
  image: https://i.imgsafe.org/ba/ba67f81418.png
digibyte socks:
  price: 5
  title: Digibyte Socks
  description:  Show your love for Altcoins with these Digibyte socks!
  image: https://i.imgsafe.org/ba/ba680067f8.png
monero socks:
  price: 25
  title: Monero Socks
  description:  Show your passion for privacy with these Monero socks!
  image: https://i.imgsafe.org/ba/ba68393c34.png
Finally, since BTCPayServer is built on Bootstrap, we can add a css file in the “Custom bootstrap CSS file” field. Since these are some awesome socks, I wanted to give it some class and used the Lux Theme :)
https://bootswatch.com/4/lux/bootstrap.min.cssSo there we have it! A custom point of sale app which users can use to buy some socks!
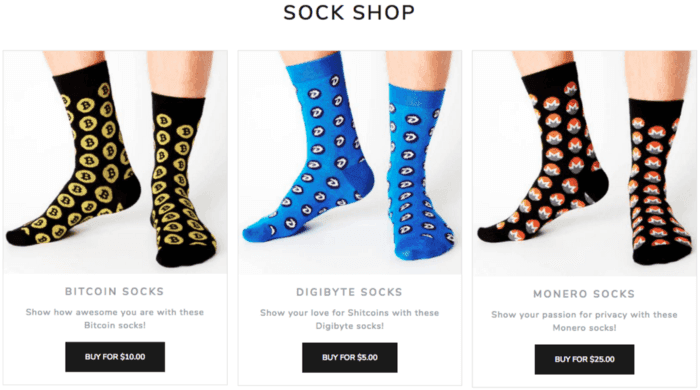
Check out the store here! *None of the images are mine and if you would actually like to buy these socks head on over here.
React Frontend for our Sock Shop
Now where does React fit in with all of this?

First, the app works best as a physical point of sale, meaning the customer is at the store and has the app open, but it isn’t really useful if we want to have a website where anybody in the world can purchase from us. We can’t customize the shop, we can’t give it a custom URL, place our own icon or add a contact page for our customers!
One choice would have been to create a Wordpress store which can be easily integrated with a BTCPayServer plugin, but it would need to be hosted, which means $$, and for something as simple, as what I was looking for, it was just to much.
Since I wanted a single page app and no backend, I decided on using React. Of course being a React developer and enthusiast took part in this decision.
Let’s build it.
These are the tools that we will be using:
- ReactJs (with create-react-app)
- React Router
- Ant Design
So first off, create your app and install the dependencies that we will use.
create-react-app app
cd app
npm install -s react-router-dom antd
If everything installed correctly and you run npm start you should get the following site in your browser
Now, replace everything in App.css with the following
@import '~antd/dist/antd.css';
.App {
  text-align: center;
}
Everything in index.js with the following
import React from 'react';
import ReactDOM from 'react-dom';
import './index.css';
import App from './App';
import * as serviceWorker from './serviceWorker';
import { BrowserRouter } from 'react-router-dom';

ReactDOM.render(
  <BrowserRouter>
    <App />
  </BrowserRouter>,
  document.getElementById('root')
);
serviceWorker.unregister();
And everything in App.js with the following
import React from 'react';
import './App.css';
import { Link, Route, Switch } from 'react-router-dom';
import { CardGrid } from './components/CardGrid';
import { Layout, Menu } from 'antd';
const { Header, Content, Footer } = Layout;

const NotFound = () => <h1>Not Found</h1>;
const Contact = () => <h1>CONTACT ME AT...</h1>;
const Terms = () => <h1>THESE ARE THE TERMS AND CONDITIONS</h1>;
const Paid = () => <h1>THANKS FOR YOUR PAYMENT!</h1>;

class App extends React.Component {
  render() {
    return (
      <Layout style={{ height: 'auto' }}>
        <Header style={{ position: 'fixed', zIndex: 1, width: '100%' }}>
          <img
            src={'https://i.imgsafe.org/bb/bb032c48d8.png'}
            alt={'shopIcon'}
            height={'64px'}
            style={{ float: 'left', marginRight: '20px' }}
          />
          <Menu theme="dark" mode="horizontal" style={{ lineHeight: '64px' }}>
            <Menu.Item key="1">
              <Link to="/">Store</Link>
            </Menu.Item>
            <Menu.Item key="2">
              <Link to="/contact">Contact</Link>
            </Menu.Item>
            <Menu.Item key="3">
              <Link to="/terms">Terms and Conditions</Link>
            </Menu.Item>
          </Menu>
        </Header>
        <Content
          className={'App'}
          style={{ padding: '0 50px', marginTop: 84, height: '100%' }}
        >
          <Switch>
            <Route path="/" exact component={CardGrid} />
            <Route path="/contact/" component={Contact} />
            <Route path="/terms/" component={Terms} />
            <Route path="/paid/" component={Paid} />
            <Route component={NotFound} />
          </Switch>
        </Content>
        <Footer style={{ textAlign: 'center' }}>
          SockShop ©2019 Created by APotdevin
        </Footer>
      </Layout>
    );
  }
}

export default App;
Here we created the main layout of the page consisting of a header with an icon and three buttons and the content where the different pages will be displayed.
So now lets create the CardGrid view where the socks will be shown.
Create a new folder inside the src folder called components and create these three files inside: CardGrid.jsx , PaymentBox.jsx and SockCard.jsx. And fill in each one with the respective code shown below.
// CardGrid.jsx
import React from 'react';
import { SockCard } from './SockCard';
import { Row, Col } from 'antd';

export const CardGrid = () => (
  <Row type={'flex'} justify={'center'}>
    <Col xs={24} sm={24} lg={12} xl={8}>
      <SockCard title={'Bitcoin Socks'} coin={'bitcoin'} price={10} />
    </Col>
    <Col xs={24} sm={24} lg={12} xl={8}>
      <SockCard title={'Digibyte Socks'} coin={'digibyte'} price={5} />
    </Col>
    <Col xs={24} sm={24} lg={24} xl={8}>
      <SockCard title={'Monero Socks'} coin={'monero'} price={25} />
    </Col>
  </Row>
);
// PaymentBox.jsx
import React from 'react';
import { Input, Checkbox, Button, message } from 'antd';
export class PaymentBox extends React.Component {
constructor(props) {
super(props);
this.state = {
email: '',
confirm: false,
};
}
handleInput = e => {
this.setState({ email: e.target.value });
};
handleCheckbox = e => {
this.setState({ confirm: e.target.checked });
};
render() {
const disabled =
this.state.email !== '' &&
this.state.confirm &&
this.state.email.match(/^([\w.%+-]+)@([\w-]+\.)+([\w]{2,})$/i)
? false
: true;
return (
<div style={{ padding: '15px' }}>
<Input
placeholder="Please input your email"
style={{ marginBottom: '10px' }}
onChange={this.handleInput}
onBlur={() =>
!this.state.email.match(/^([\w.%+-]+)@([\w-]+\.)+([\w]{2,})$/i)
? message.warning('Email is not valid')
: null
}
/>
<Checkbox
style={{ marginBottom: '10px' }}
onChange={this.handleCheckbox}
>
I Accept the Terms and Conditions
</Checkbox>
<Button
disabled={disabled}
style={{ width: '150px' }}
value={this.props.coin}
>
{`To Payment ($${this.props.price})`}
</Button>
</div>
);
}
}// SockCard.jsx
import React from 'react';
import { PaymentBox } from './PaymentBox';
const sockImageUrl = {
bitcoin: 'https://i.imgsafe.org/ba/ba67f81418.png',
digibyte: 'https://i.imgsafe.org/ba/ba680067f8.png',
monero: 'https://i.imgsafe.org/ba/ba68393c34.png',
};
const sockDesc = {
bitcoin: 'Show how awesome you are with these Bitcoin socks!',
digibyte: 'Show your love for Shitcoins with these Digibyte socks!',
monero: 'Show your passion for privacy with these Monero socks!',
};
export const SockCard = ({ title, coin, price }) => (
<div
style={{
width: '400px',
margin: '0 auto',
background: '#fff',
padding: '10px',
textAlign: 'center',
borderRadius: '5px',
marginBottom: '10px',
}}
>
<h1>{title}</h1>
<img src={sockImageUrl[coin]} alt={'sockImage'} width={'350px'} />
<h3>{sockDesc[coin]}</h3>
<PaymentBox price={price} coin={coin} />
</div>
);These three files create the UI in this structure:
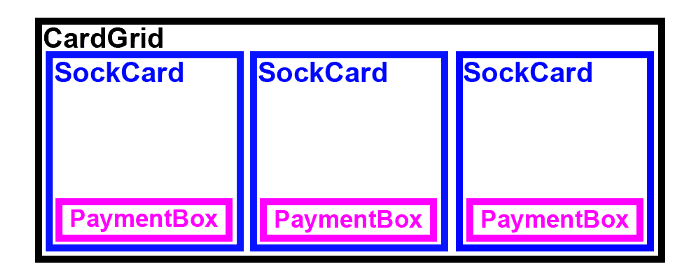
Now if you run npm start you should see the sock shop with all of its different views.
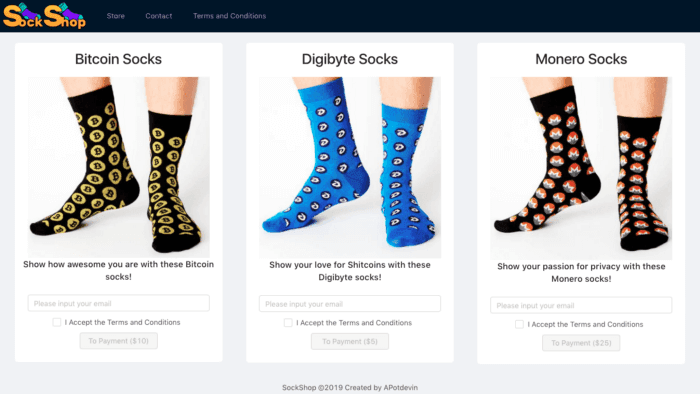
But, as you have probably realized, the “To Payment” buttons don’t do anything. Let’s fix that.
Joining the React frontend to BTCPayServer
Finally we will join BTCPayServer to the React frontend we have just built. So head on over to BTCPayJungle and then to the settings of the app we created previously.
Below the “Template” field you will see a section called “Host Button Externally” and a form that should look like this:
<form method="POST" action="[YOUR_OWN_URL]">
  <input type="hidden" name="email" value="customer@example.com" />
  <input type="hidden" name="orderId" value="CustomOrderId" />
  <input
    type="hidden"
    name="notificationUrl"
    value="https://example.com/callbacks"
  />
  <input
    type="hidden"
    name="redirectUrl"
    value="https://example.com/thanksyou"
  />
  <button type="submit" name="choiceKey" value="bitcoin">Buy now</button>
</form>
We will need to add parts of this form inside the div of the payment box as shown below with the red boxes.
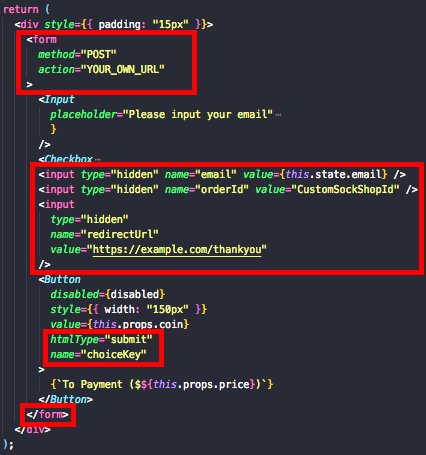
So finally your PaymentBox component should look like this:
import React from 'react';
import { Input, Checkbox, Button, message } from 'antd';

export class PaymentBox extends React.Component {
  constructor(props) {
    super(props);
    this.state = {
      email: '',
      confirm: false,
    };
  }

  handleInput = e => {
    this.setState({ email: e.target.value });
  };

  handleCheckbox = e => {
    this.setState({ confirm: e.target.checked });
  };

  render() {
    const disabled =
      this.state.email !== '' &&
      this.state.confirm &&
      this.state.email.match(/^([\w.%+-]+)@([\w-]+\.)+([\w]{2,})$/i)
        ? false
        : true;

    return (
      <div style={{ padding: '15px' }}>
        <form
          method="POST"
          action="https://testnet.demo.btcpayserver.org/apps/37NLaNoSEjz6J39eHUKMdgKYz7gv/pos"
        >
          <Input
            placeholder="Please input your email"
            style={{ marginBottom: '10px' }}
            onChange={this.handleInput}
            onBlur={() =>
              !this.state.email.match(/^([\w.%+-]+)@([\w-]+\.)+([\w]{2,})$/i)
                ? message.warning('Email is not valid')
                : null
            }
          />
          <Checkbox
            style={{ marginBottom: '10px' }}
            onChange={this.handleCheckbox}
          >
            I Accept the Terms and Conditions
          </Checkbox>
          <input type="hidden" name="email" value={this.state.email} />
          <input type="hidden" name="orderId" value="CustomSockShopId" />
          <input
            type="hidden"
            name="redirectUrl"
            value="https://example.com/thankyou"
          />
          <Button
            disabled={disabled}
            style={{ width: '150px' }}
            value={this.props.coin}
            htmlType="submit"
            name="choiceKey"
          >
            {`To Payment ($${this.props.price})`}
          </Button>
        </form>
      </div>
    );
  }
}
And that’s it! As you have seen the integration is simple. No need to create a backend or handle cookies. Very straight forward using a Post Request that is provided by the BTCPayServer API. Now if you click on the “To Payment” button you should be redirected to the payment module we created and customized to our liking.
Deploy for FREE!
Now that we have everything set up, since it’s a very simple app with no backend, we can easily deploy our React App for $0 using Netlify or Surge! I would personally recommend Netlify as it includes HTTPS in its free tier while Surge does not.
Conclusion
So we have finished the complete store for a total cost of $0 and it only took us a couple of hours! I would say for simple stores its completely worth the time and effort. No more asking users to go into block explorers and look for transaction Ids, no more privacy issues or third parties.
- If you want to see the final version of the app and even try to do some payments on testnet, click here!
- If you want to see the final code repo or even clone it, click here!
Using this method to receive payments is very simple but does come with drawbacks.
- You can’t add more information to the invoice like customer address or phone number. This complicates the payment process if you are creating a store that has to deliver physical products to customers.
- You have to keep the price in BTCPayServer and your React frontend up to date manually.
- You can’t handle the view when a customer pays or has an expired invoice and is redirected to the store.
It was very cool experimenting with these tools and I hope I have shown you that with basic programming knowledge you can create an online store that receives Bitcoin. All of this, using only open source technology, so no third party that can censure you, have control of your keys or charge you a fee.
Hope you have enjoyed this small tutorial!
If you have any questions about the topic, fell free to contact me on twitter.